Overview
Divides a lot into ‘n’ number of parcels perpendicular to the selected cutting edge (Front Lot Line). Ensure assigning a coordinate system to the drawing. This assignment is crucial for tasks such as area measurement, annotation, and exporting parcels to KML and shapefile.
1- EQUAL PARCELS
- Click on “Lot Division” in the Cadaster panel, then select “Across The Front Lot Line” from the dropdown menu, or type DDX_SP in the command line.

Note: Ensure that the Front Lot Line or Cutting Polyline is already drawn.
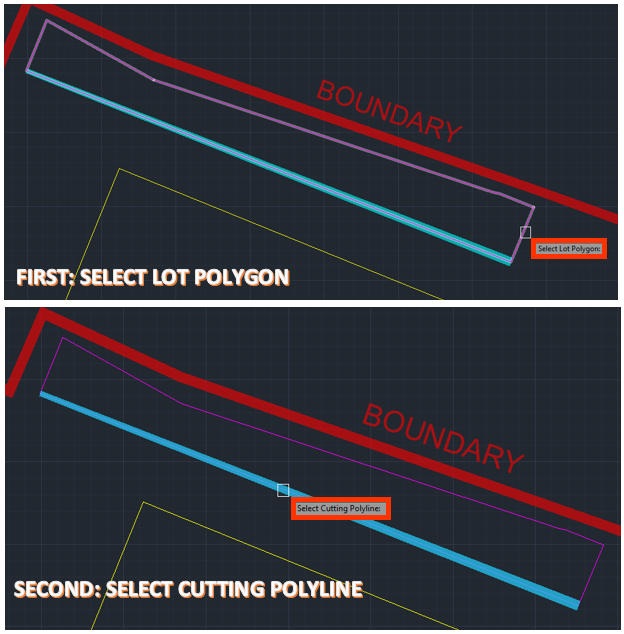
- Select a lot, then select the already drawn Cutting Polyline.
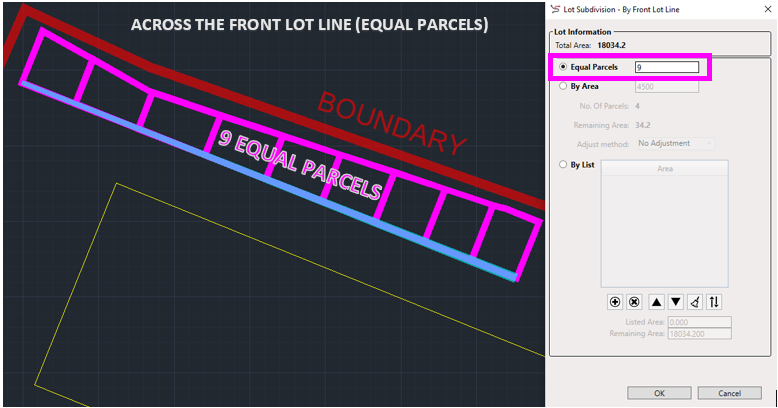
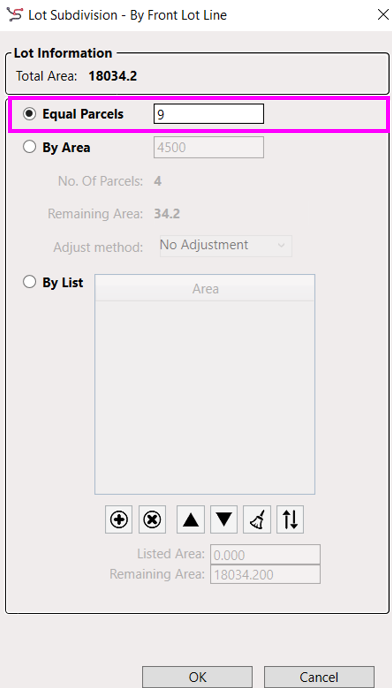
- A Dialogue Box will appear. ‘Equal Parcels’ would be already selected.
- Enter the number of Equal parcels you want to be made in your Lot.
- Click Ok.
For Example, In the image above, we divided our Lot into 9 equal parcels.
2- BY AREA

- Click on “Lot Division” in the Cadaster panel, then select “Across The Front Lot Line” from the dropdown menu, or type DDX_SP in the command line.
Note: Ensure that the Front Lot Line or Cutting Polyline is already drawn. - Select a lot, then select the already drawn Cutting Polyline.
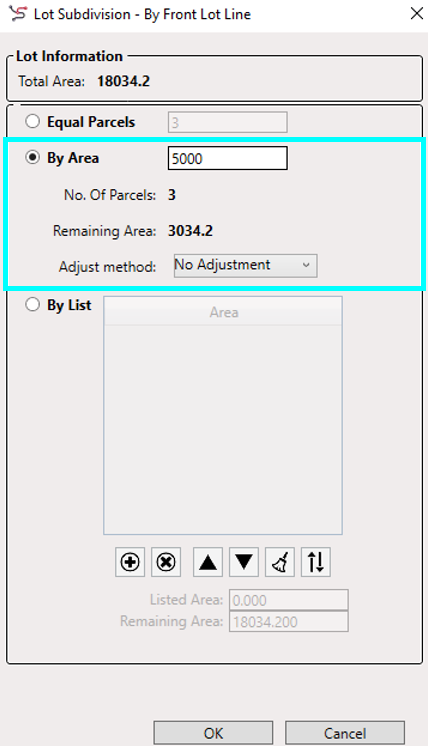
- A Dialogue Box will appear. Now select ‘By Area’.
- Enter the area you want your parcels to be divided into.
- If there is remaining area, then choose an adjustment method.
- Click Ok.
For example, in the image above, we divided the given area into parcels of 5000 each.
The number of parcels created will be 3, as shown. Each of these 3 parcels contains an area of 5000.
However, upon closer inspection, there is also a 4th parcel. It is indeed a part of the lot, but its area is not 5000; rather, it is 3034.2, representing the remaining area. Since we did not choose an adjustment method, this 4th parcel is displayed separately, following the 3 parcels of 5000.
3- BY LIST
- Click on “Lot Division” in the Cadaster panel, then select “Across The front Lot Line” from the dropdown menu, or type DDX_SP in the command line.
Note: Ensure that the Front Lot Line or Cutting Polyline is already drawn. - Select a lot, then select the already drawn Cutting Polyline.
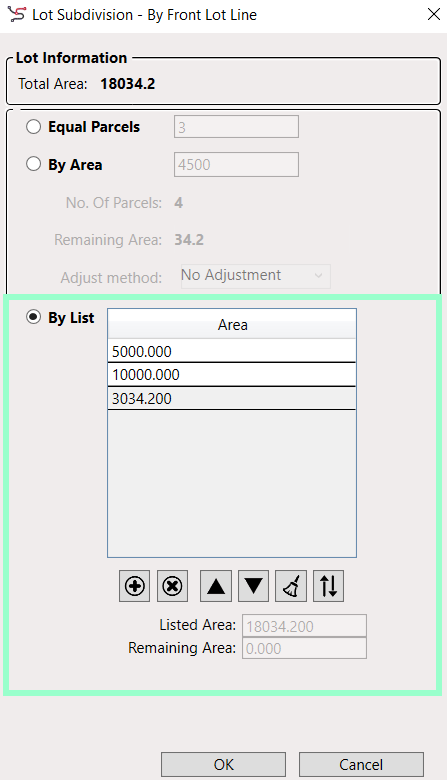
- A dialogue Box will appear. Now select ‘By List’.
- Add/Paste the list of areas in the dialogue box.
Insert from the ‘+’ given below or copy-paste the list.
Make sure the combined area of all the parcels does not exceed the Listed Area. It’s important that the sum of the areas you provided matches the Listed Area. Don’t go over this total.
- Once you’ve confirmed that the combined area aligns with the Listed Area, proceed to generate individual plots for each parcel based on the provided areas by clicking OK.
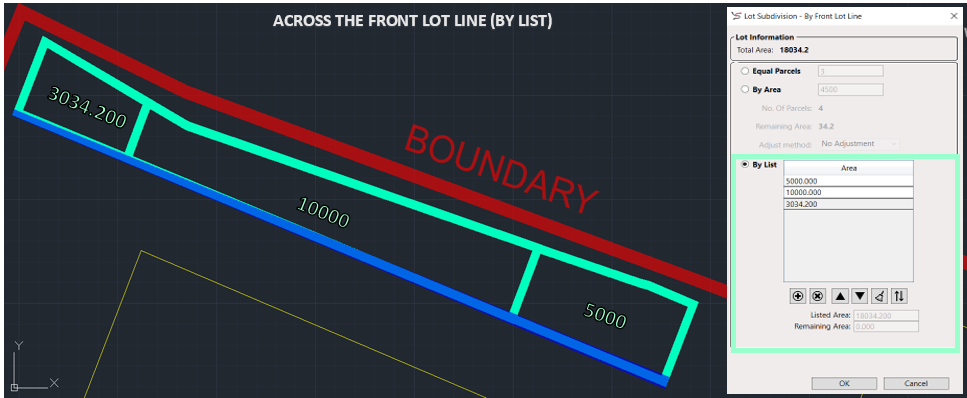
Example
We had a total area of 18034.200.
As there is no left and right here, we will only give a single list.
We have added 5000, 10000, and 3034.200.
3 parcels are made of unique areas but all fit within the total listed area.
When you add up these areas, the total should exactly match the Listed Area. This ensures that all the plots collectively fit within the specified total area.